Create and manage forms
Allows you to build forms and manage events (optional).
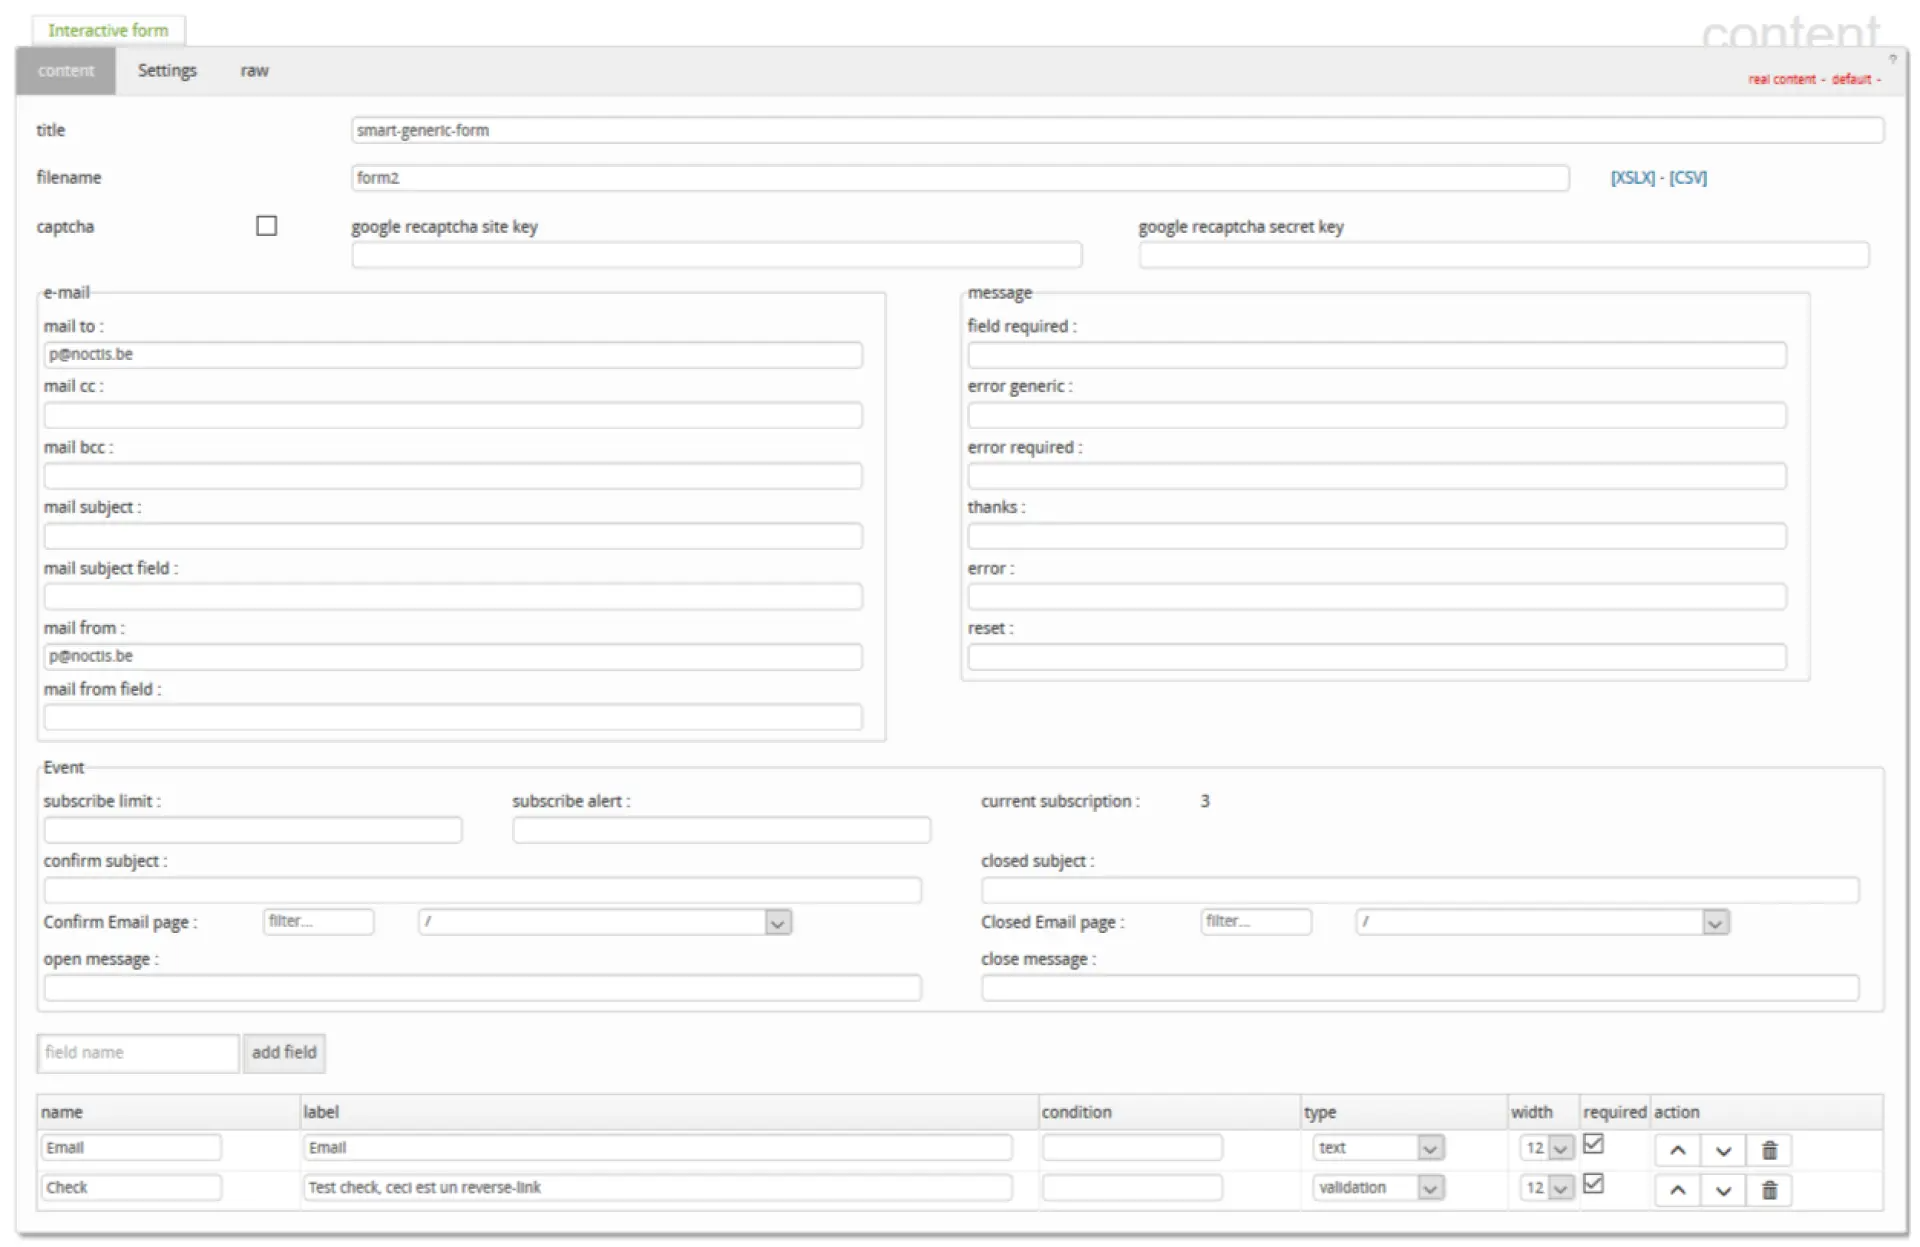
Form configuration
- title : Form title (optional).
- filename : Name of the file (csv) that will contain the data filled in by the site visitors. (the file can be downloaded directly in xlsx or csv format in the component).
- captcha : Allows you to activate a captcha (internal or via google https://www.google.com/recaptcha/intro/android.html).
- Emails
- mail to : Mail that will receive the information if a visitor fills the form.
- mail cc : iden 'mail to' but in cc
- mail bcc : iden 'mail to' but in bcc
- mail subject : Subject of the mail which contains the information entered by the visitor.
- mail subject field : Field in the form to be used as the subject of the email.
- mail from : Recipient of the email.
- mail from field: Field containing the recipient of the mail (given the evolution of the anti-spam rules, to be used only in an 'intranet' context).
- Messages
- field required : Indicates the message to designate the required fields.
- error generic : Generic validation error message.
- error required : Message if required fields are not filled in.
- thanks : Message to be displayed after a valid filling of the form.
- error : Technical error.
- reset : Message to reset the form.
Event
- subcribe limit : Allows you to set the registration limit for the event.
- subscribe alert : Allows to give a limit where the administrator will be informed (lower than the 'susribe limit').
- confirm subject : Subject of the registration confirmation email to the user.
- confir email page : Gives the page that will be used to send the response to the user.
- open message : Message if there is still room.
- closed subject : Subject of the confirmation email if there are no more places (waiting list).
- closed email page : Gives the page that will be used to send the answer to the user (waiting list).
- close message : Message to be displayed in front of the form if there is no space left.
Editing the form
After choosing a name for the field, it is a code the label to display will be chosen later. We click on "add field", the new field is then created. You must give it :
- a label : to be displayed for the user
- condition : allows not to display a field depending on the value of another field
- type : type of field
- width : width of the field in the grid (between 1 and 12)
- required : indicates if the field is required
- action : allows to move the field or to delete it.
Type of fields
- email : an email
- file : a file that the visitor can upload
- large-text : a text of several lines
- list : a list (to be added directly)
- number : an integer number
- registered-list : a choice from an internal javlo list
- static-text : an explanatory text (not a data field)
- static-title : an explanatory title (not a data field)
- text : a simple text
- true-false : a choice between true and false
- validation : a checkbox
- vat : a VAT number
- yes-no : a choice between yes and no
It's possible to prepare an e-mail to be sent to all event participants.
This mail is in a content page like the others (template mailing), the content can contain the following tokens:
Field values can be accessed via ${field.#name#}.
${registrationID} = registration id
${communication} = registration id / communication format transfer mod 9
${htmlFields} = HTML data table

${url.edit} = edit url
${url.valid} = validation url
${url.page} = page url
${url.root} = site root url

${event.title} = event title
${event.location} = event location

${event.description} = page description

${event.start} = start of event
${event.end} = end of event